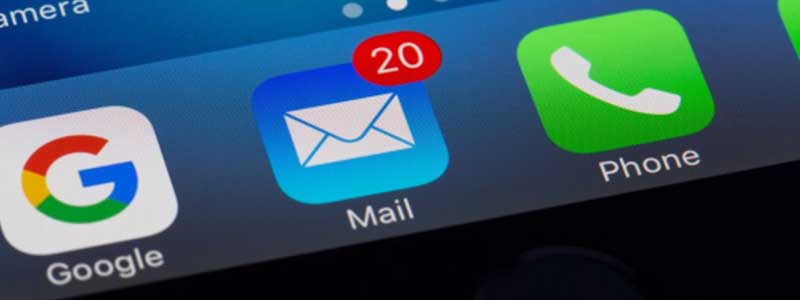
In the fast-paced world we live in, staying connected is more critical than ever, especially during emergencies. However, amidst the constant notifications and alerts, important calls and messages can sometimes get lost in the shuffle. This is where the feature of Emergency Bypass iPhones comes to the rescue. Emergency Bypass on iPhone is a powerful tool designed to ensure that specific contacts can always reach you, even when your device is set to silent or Do Not Disturb mode.
Whether it’s a family member, a close friend, or a vital service provider, enabling emergency bypass can make the difference between timely assistance and missed opportunities during critical moments. In this guide, we’ll delve into what emergency bypass iPhone entails, why it’s essential, and, most importantly, how you can enable it on your iPhone to stay reliably connected when it matters most.
What is an Emergency Bypass?
Before we go into how to enable the Emergency Bypass iPhone, first it is important to understand what is Emergency Bypass on iPhone. Emergency Bypass is a feature integrated into the iOS operating system that allows users to designate specific contacts as emergency bypass contacts. When enabled for a contact, it ensures that calls and messages from that contact will bypass the silent or Do Not Disturb settings on your iPhone. Essentially, it gives priority to these designated contacts, ensuring that you never miss important calls or messages from them, even if your device is set to silence or downtime mode.
This feature can be immensely valuable in situations where you need to stay reachable for urgent matters, such as family emergencies, critical work calls, or healthcare providers trying to reach you. By setting up an iPhone emergency bypass, you can have peace of mind knowing that certain contacts will always be able to get through to you, regardless of your device’s current settings.
Why Enable Emergency Bypass?
Enabling Emergency Bypass on iPhone is crucial for ensuring that you never miss critical calls or messages during emergencies. In today’s fast-paced world, where we rely heavily on our smartphones for communication, missing an important call or message can have serious consequences. By designating certain contacts as emergency bypass contacts, you’re essentially creating a fail-safe mechanism that ensures you’re always reachable when it matters most.
Whether it’s a family member trying to reach you in a time of need, a healthcare provider with urgent medical information, or a work-related emergency, enabling emergency bypass iPhone ensures that these essential communications are never overlooked. Moreover, in situations where silence or downtime is necessary, such as during meetings or while sleeping, emergency bypass provides a way for critical contacts to break through without disrupting your overall peace and quiet. In essence, enabling emergency bypass iPhone is about prioritising communication during emergencies and ensuring that you’re always accessible to those who need you most.
Compatibility and Requirements
Before diving into enabling Emergency Bypass on iPhone, it’s essential to know the compatibility and requirements for this feature. Emergency Bypass functionality is available on iPhones running iOS 10 and later versions. Therefore, if you’re using an iPhone that supports iOS 10 or later, you should be able to take advantage of this feature. It’s worth noting that not all iPhone models may support the latest iOS version, so it’s essential to ensure that your device is compatible with the required iOS version.
Additionally, Emergency Bypass iPhone settings may vary slightly depending on the iOS version you’re using. While the core functionality remains consistent, some features or settings may be enhanced or modified in newer iOS versions. Therefore, it’s recommended to keep your iPhone’s operating system updated to the latest available version to access the most current Emergency Bypass features and improvements.

Moreover, it’s important to note that Emergency Bypass iPhone settings are configured on a per-contact basis. This means that you can enable Emergency Bypass for specific contacts individually, allowing you to customise who can bypass your device’s silent or Do Not Disturb mode. This contact-specific customization provides flexibility and control over which calls and messages can break through your device’s silence settings during emergencies.
How to Enable Emergency Bypass
Enabling Emergency Bypass on iPhone is a simple yet powerful feature that ensures you never miss important calls or messages, even when your device is set to silent or Do Not Disturb mode. Follow these comprehensive step-by-step instructions to set up Emergency Bypass on iPhone for specific contacts:
Step 1: Begin by opening the Contacts app on your iPhone. This can usually be found on your home screen or by swiping down and using the search function.
Step 2: Once in the Contacts app, locate and select the contact for which you want to enable Emergency Bypass. You can either scroll through your contacts list or use the search bar at the top to find the specific contact.
Step 3: After selecting the contact, tap on the “Edit” button located in the upper-right corner of the screen. This will allow you to make changes to the contact’s details.
Step 4: Scroll down the contact’s information until you find the options for “Ringtone” and “Text Tone.” These options control the sound your phone makes when receiving a call or message from this contact.
Step 5: Tap on either “Ringtone” or “Text Tone,” depending on whether you want to enable Emergency Bypass for calls or messages. This will bring up a menu where you can select the tone you want to use.
Step 6: Within the tone selection menu, you’ll see a toggle switch labelled “Emergency Bypass.” Simply tap on this toggle switch to enable Emergency Bypass for the selected contact. You’ll know it’s enabled when the toggle switch turns green.
Step 7: Once you’ve turn on Emergency Bypass iPhone, tap on the “Done” button in the upper-right corner to save your changes and exit the contact editing screen.
Step 8: If you have additional contacts for which you want to enable Emergency Bypass, simply repeat the above steps for each contact.
Step 9: To confirm that Emergency Bypass has been successfully enabled for a contact, you can return to their contact details and verify that the Emergency Bypass toggle switch is green.
Step 10: Finally, you may want to test the feature by having the designated contact call or message you while your device is in silent or Do Not Disturb mode to ensure that the Emergency Bypass functionality is working as expected.
By following these detailed instructions, you can customise your iPhone to ensure that important calls and messages from designated contacts always reach you, even in situations where your device’s sound settings would normally prevent notifications.
Customizing Emergency Bypass Settings
While enabling Emergency Bypass for specific contacts ensures that critical calls and messages can reach you, iOS also provides additional customization options to tailor this feature to your preferences and needs. Here’s how you can customise iPhone Emergency Bypass settings.
Adjusting Ringtone and Text Tone: Within the contact’s details, you can choose the specific ringtone or text tone that will sound when receiving calls or messages from the designated contact. This allows you to differentiate between regular notifications and those from emergency bypass contacts.
Notifications Priority: iOS allows you to prioritise notifications from emergency bypass contacts over other notifications. By default, emergency bypass notifications are displayed prominently on your lock screen and in the notification centre, ensuring that you’re immediately aware of incoming calls or messages from designated contacts.
Snooze Emergency Bypass: In situations where you temporarily need silence but still want to ensure that emergency bypass contacts can reach you if needed, iOS offers the option to snooze emergency bypass temporarily. This allows you to silence notifications for a specified period without permanently disabling emergency bypass for the contact.
By customising Emergency Bypass settings according to your preferences and requirements, you can ensure that you strike the right balance between staying reachable during emergencies and maintaining control over your device’s notifications.
Final Words
Enabling Emergency Bypass on iPhone is a proactive step towards ensuring that you remain accessible during critical moments. This feature provides a lifeline for important calls and messages, allowing designated contacts to reach you even when your device is set to silent or Do Not Disturb mode. By customising iPhone Emergency Bypass settings, you can strike a balance between staying reachable during emergencies and maintaining control over your device’s notifications.
However, it’s essential to use Emergency Bypass properly and considerately, selecting contacts wisely and regularly reviewing settings to ensure they align with your current needs. Embracing Emergency Bypass iPhone feature empowers you to navigate emergency situations with confidence, knowing that you’re always within reach of those who need you.